Installing and configuring CEPH in Proxmox
In the next post, Proxmox and Ceph from 0 to 100 part III, we will discuss the installation and configuration of Ceph in Proxmox.
First of all we have to know that Ceph is a free, scalable, high performance and robust distributed file system, designed to have no single point of failure, error free and fault tolerant. In an infrastructure we have to know the elements that make up a Ceph cluster:
Cluster monitors (ceph-mon) that are in charge of maintaining and managing the activity in the nodes, monitoring the manager service, object storage server and metadata server components in order to achieve the Ceph objective. In any production cluster, the minimum is to have three monitors, therefore in our lab, the three nodes will be Node Monitors.
Manager, in charge of managing space utilization, metrics and cluster status. At least 2 of the nodes must have this role.
OSD (object storage daemon), responsible for storage, duplication and restoration. As with the monitors, a minimum of 3 is recommended.
Metadata server, which stores metadata and allows basic POSIX filesystem commands. It would allow us to create a CephFS.
Ceph would not be possible without its CRUSH algorithm, which determines how to store and retrieve data by calculating data storage locations, i.e., it requires a map of your cluster which contains a list of OSDs and rules for how it should replicate data, using the map to store and retrieve data pseudo-randomly in OSDs with an even distribution of data across the cluster.
Regarding the requirements, we have to take into account:
Create one OSD per disk
Assign a subprocess per OSD, that is, a thread.
Size RAM at a minimum ratio of 1 GB per TB of disk storage on the OSD node.
For production 10 Gigabit cards available
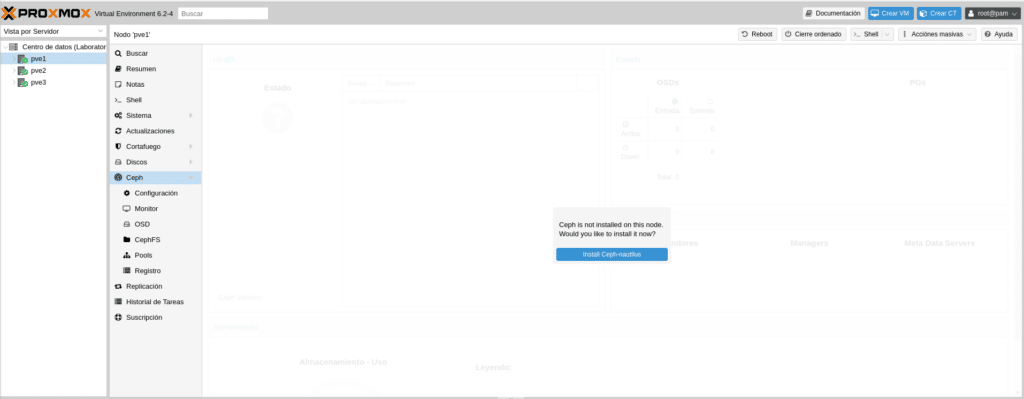
Having commented all the above, let’s move on to the installation and configuration. Once logged into our cluster, let’s start with PVE1 in the CEPH section, where a sign indicates that Ceph is not installed and if we would like to install it now.
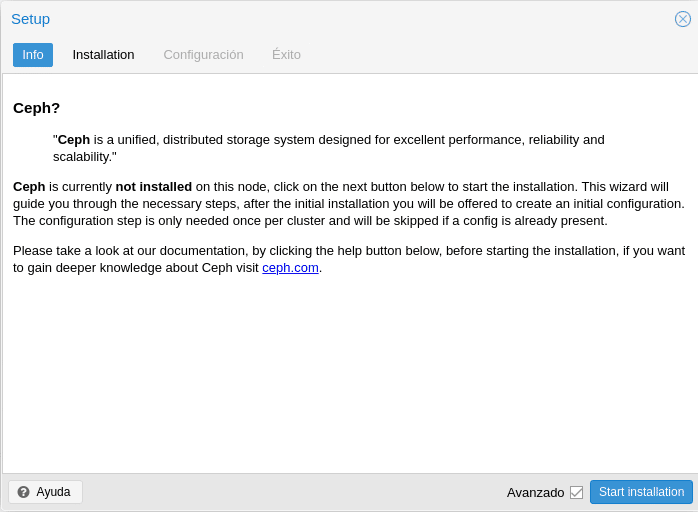
We click on Install Ceph-nautilus and it will show us a small info about CEPH and a link to the documentation.
We click on start installation and after a few seconds we will get.
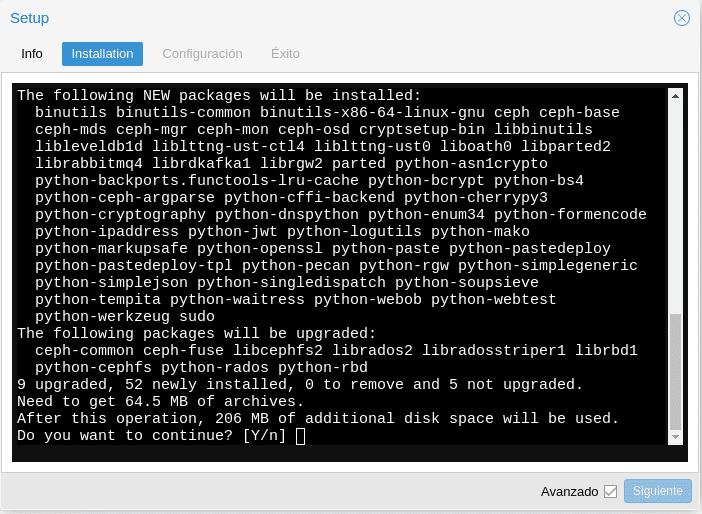
We say “Y” and wait for it to finish and Installed ceph nautilus successfully, to click next.
In the following screen you will find the configuration
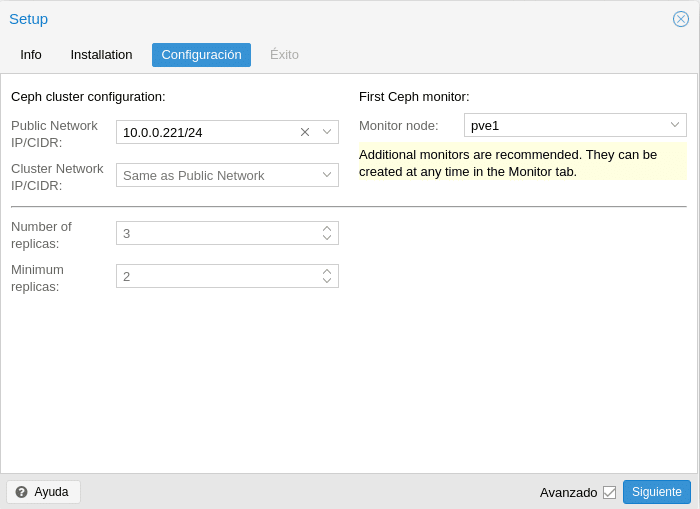
In this first part we can call our attention, public network and cluster network, where the Ceph documentation itself tells us that using a public network and a cluster network would complicate the configuration of both hardware and software and usually does not have a significant impact on performance, so it is better to have a bond of cards so that the NICs are active / active and configure that both networks are the same network, ie, simply in the Public Network we select our internal interface, in this case the 10. 0.0.0.221/24 and in Cluster Network “Same as Public Network”, but if we want to be fine and separate it in these 2 networks, the Cluster Network would be the OSD replication and the heartbeat traffic and in the Public Network the rest of Ceph traffic.
In the replicas part we will configure the number of replicas that we will have for each object, the more replicas, the more space consumed but we will increase the number of allowed failures. Regarding the Minimum replicas it establishes the minimum number of replicas required for I/O, that is to say, how many have to be OK to have access to the data, if we put 3 in Number of replicas and Minimum 3, as soon as a replica falls we will stop having access to the data therefore minimum we have to put one less so that everything continues working. Keep in mind when configuring that you can always increase the number of replicas later, but you will not be able to decrease, you will have to create a new pool, move the data and then delete the old one to be able to reduce the number of replicas.
And finally as it is the first Ceph monitor it indicates us that more monitors are recommended, in fact as I say minimum 3 in production not to have problems, we give to create and in the following screen to Finish.
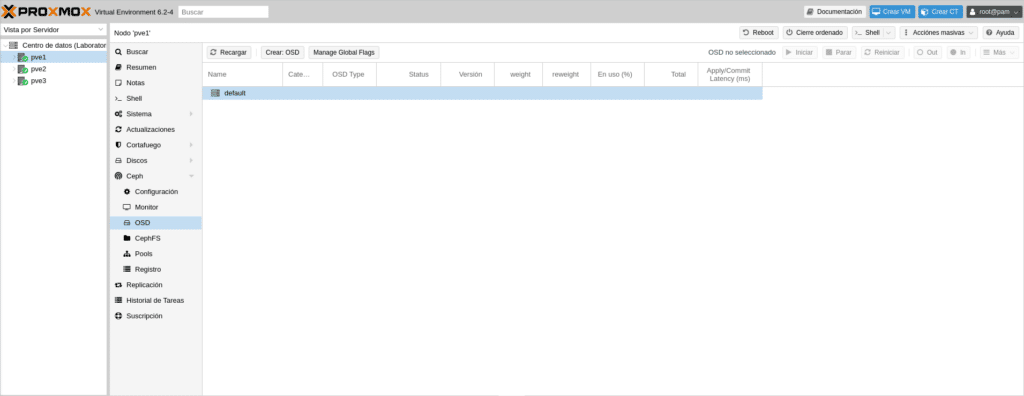
Once this part is finished we go to the OSD section and click on Create: OSD to add our OSD.
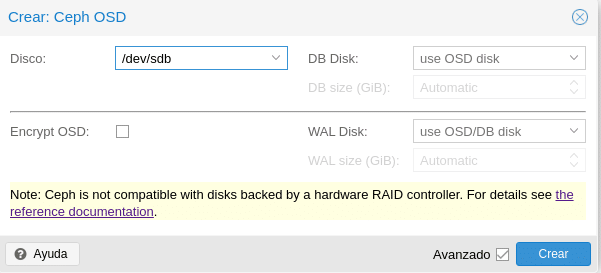
It is noted that Ceph warns us that it is not compatible with Hardware Raid and a link with more details.
In Disk we select the disk we are going to use in this case the one we have of 40 GB. Then we have 2 fields DB Disk and WAL Disk, before Ceph Luminous used Filestore as default storage for Ceph OSD. As of Ceph Nautilus Proxmox no longer supports the creation of OSD filestore, although it can still be created by console using the ceph-volume command. Now it uses Bluestore which needs both parameters, DB for the internal metadata and WAL for the internal journal or write-ahead, so it is recommended as we have indicated in several occasions to use SSD. We can configure the space letting it manage it automatically or setting an amount, taking into account that we will need for DB 10% of the OSD and for WAL 1% of the OSD and we can even select another different disk. Regarding Encrypt OSD as its name indicates if we want to encrypt them.
In this lab we will leave it as it is in the image, configured according to the scenario and architecture that you are going to perform.
We repeat the steps to install CEPH with PVE2 and PV3, with the only difference, that in configuration it will tell us that the Configuration already initialized.
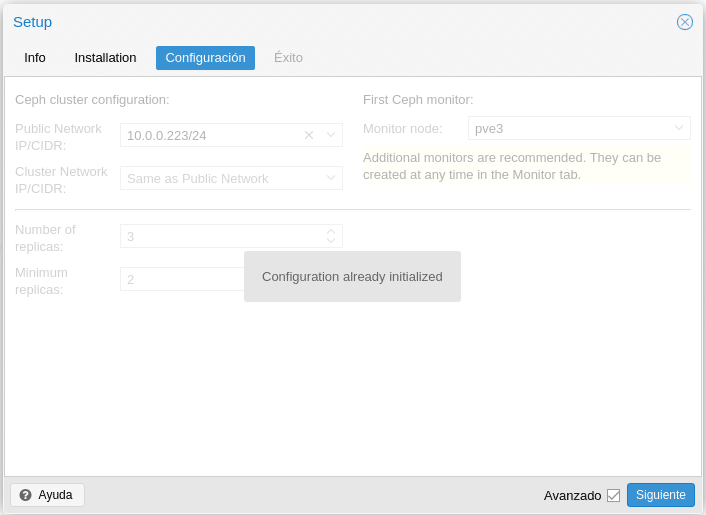
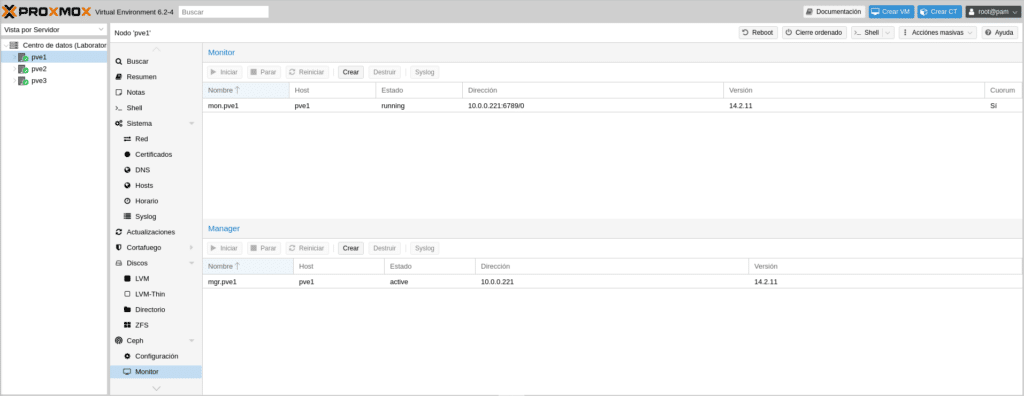
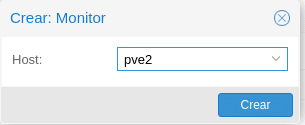
Click on Next and Finish. We go to PVE1/Ceph/Monitor and we click on Create
Select PVE2 in the next screen and create
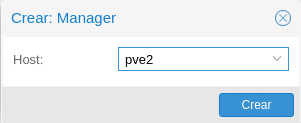
Repeat for PVE3 and do the same in Create in the Manager section for both nodes.
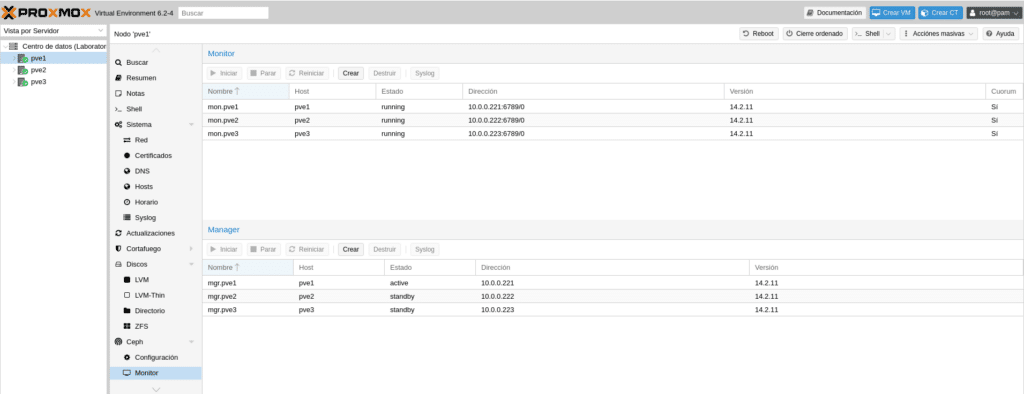
The result is as follows
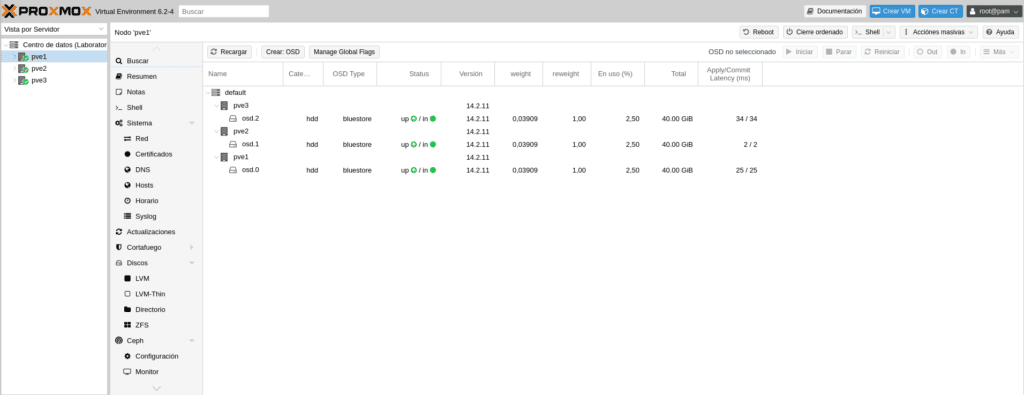
Next we will have to add the OSD of PVE2 and PVE3 following the steps we did to add the OSD of PVE1 going to the Ceph/OSD section of each node, having as a result
Now perhaps comes the most complicated part of CEPH, the crush rules to make osd groups and to be able to mount the pools, for example if we have normal disks, ssd and nvram we will have to create 3 rules or if we have all SSD but we want to make several pools if we have 50 disks selecting the osd for each pool.
For it we will have to obtain the CRUSH Map decompile it, modify it and compile it again. To do this we go to the shell and we will have to write the following:
To obtain it
ceph osd getcrushmap -o {compiled-crushmap-filename}
In other words,
ceph osd getcrushmap -o cephrulescompiled
To decompile it
crushtool -d cephrulescompiled -o cephrules.txt

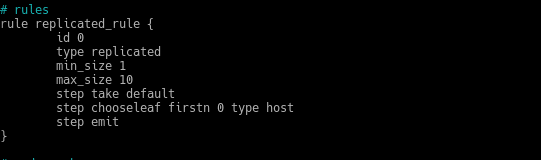
We edit the cephrules.txt file and modify the following

For this other, for example

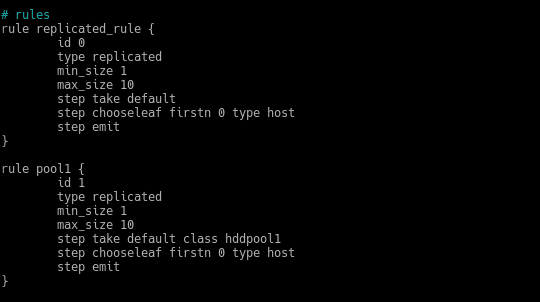
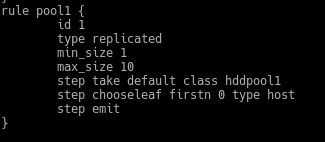
That is, we define a class. Now in the rules section
We create a new one with another name, another id and in the step take default we add our class hddpool1, looking like this
The next step would be to recompile with
crushtool -c cephrules.txt -o cephrulesnew
And establish the new map
ceph osd setcrushmap -i cephrulesnew
Once this is done, if we go to Ceph/OSD in the GUI we can see that in Category it will put hddpool1

As I have mentioned it is perhaps the most complicated of Ceph although if you get confused editing because you are missing a { for example or by bad construction will not let you recompile, yes, if in a production environment you get confused in the OSD for example and if there may be problems.
The next step would be to create the pools where the data of the virtual machines will be stored, we go to Ceph/Pools and click on create
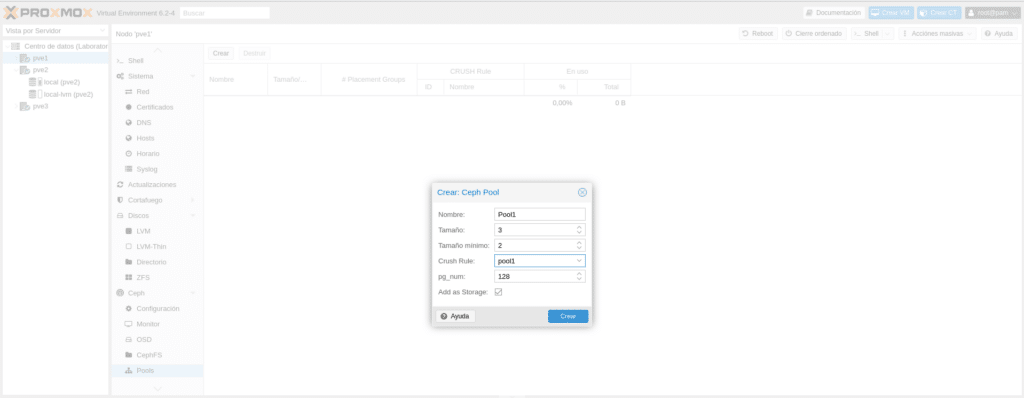
We have to give it a name “Pool1” to follow the nomenclature, the Size is the number of replicas as we saw before and the minimum size is the minimum number of replicas for I/O. Now you may wonder what the replicas are based on, by Host or by OSD, that is if we put 3, we will have the original and two more, but in different Host or OSD. The answer to this question is in the same rules file we have created, in the types section.
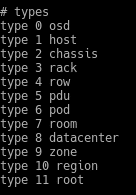
We have all these types and in the rule we define in which type it will be based on
In this case we have defined it in host, therefore we will have the original and a copy in 2 different hosts.
Next, in Crush rules we select the one we have created in the Map for Pool1, which we have called Pool1 and the pg_enum that in versions prior to Nautilus was the frustration of many, since choosing an incorrect value could not always be corrected since it could be increased but never decreased. This value was calculated with the formula (ODSs * 100)/Replicas and we had to take into account that if we increased it later, we should also increase the value of pgp_num with the same value of pg_num by launching the following commands
ceph osd pool set {nombre del pool} pg_num {new value}
ceph osd pool set {nombre del pool} pgp_num {same value of pg_num}
With Nautilus this problem disappears since it can be reduced and to forget about it we can activate the pg_autoescaler from the console with
ceph mgr module enable pg_autoscaler
and check the autoscale with
ceph osd pool autoscale-status
Finally, leave the “Add as Storage” checkbox checked to create the RDB type storage and if we launch the above command, we will get back

Notice in the AUTOESCALE parameter we have a warn, what does it mean, nothing to worry about, it is the default value in Nautilus for AUTOESCALE. We have 3 possible
off: disables automatic scaling for this group. It is up to the administrator to choose an appropriate PG count for each group.
on: enable automatic PG count adjustments for the given group.
warn: Generate health alerts when the PG count should be adjusted.
To change our pool1 to on mode and forget about it completely, we write the following in the shell:
ceph osd pool set Pool1 pg_autoscale_mode on
We do this for each pool we want, changing Pool1 for the name of the pool. These would be the console outputs.

As we can see, the data has been changed and the pg_num has been lowered to 32 without any problem when previously it was not possible.
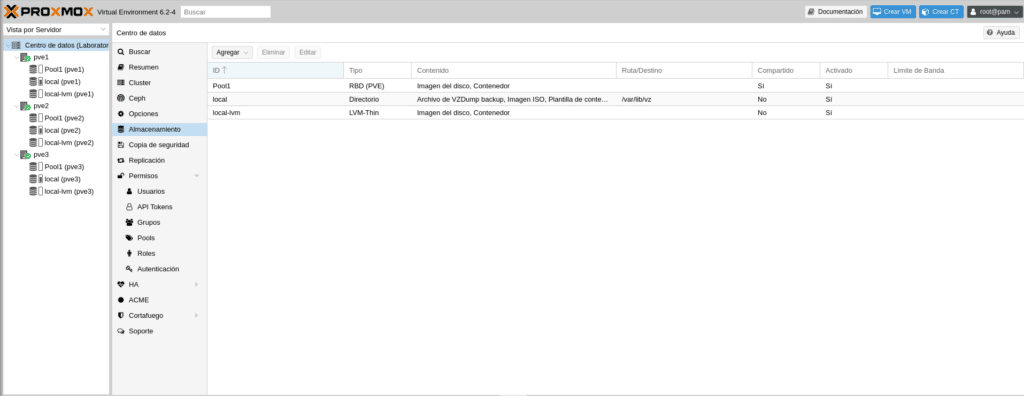
If we go to the GUI in Data Center/Storage we will see that we already have the Pool1 available for Disk Image and containers mounted on the 3 nodes.
So far we have mounted our cluster with HA and Ceph, in the next post we will see how to create an HA group, create a vm, a container and we will test HA.
I hope you liked it, enjoy life. If you want to purchase any of the licenses please contact us, we are a Proxmox partner.
Continue Proxmox and Ceph from 0 to 100 Part IV
TL.