YOUR SHORTLINKS SERVER
Let’s see how to set up your own shortlink server on Debian 11 using shlink , which has many features, multi domain, QR codes, emojis, REST API, Bot detection,….
The first thing is to install php 8.1 or 8.2 with the necessary modules, as indicated in the official documentation.
INSTALLING PHP 8.1 ON DEBIAN 11
We execute:
apt install -y lsb-release ca-certificates apt-transport-https software-properties-common gnupg2
echo “deb https://packages.sury.org/php/ $(lsb_release -sc) main” | tee /etc/apt/sources.list.d/sury-php.list
curl -fsSL https://packages.sury.org/php/apt.gpg| gpg –dearmor -o /etc/apt/trusted.gpg.d/sury-keyring.gpg
apt-get update
We have added the repositories and then installed the necessary modules.
apt-get install php-apcu php8.1 php8.1-fpm php8.1-mysql php8.1-gd php8.1-common php8.1-curl php8.1-intl php8.1-gmp php8.1-xml php-dev php-pear
We can check with:
php –modules
That they are loaded correctly.
SHLINK INSTALLATION AND CONFIGURATION
We start by installing the necessary packages.
apt-get install nginx mariadb-server unzip sudo
We created the database.
mysql
Once inside we write.
CREATE DATABASE shlink;
GRANT ALL ON shlink.* TO ‘shlink’@’localhost’ IDENTIFIED BY ‘password’;
FLUSH PRIVILEGES;
EXIT;
You can call the database whatever you like, just like the user.
Once we have the database, we proceed with the download and installation of the latest shlink version.
wget https://github.com/shlinkio/shlink/releases/download/v3.5.4/shlink3.5.4_php8.1_dist.zip
unzip shlink3.5.4_php8.1_dist.zip
mv shlink3.5.4_php8.1_dist /var/www/html/shlink
chown -R www-data:www-data /var/www/html/shlink/
chmod -R 755 /var/www/html/shlink/
cd /var/www/html/shlink
(If you do not go to this directory, the following command will not be able to write the configuration file if we execute it with the full path /var/www/htmtl…., since the path in the script is config/params to save the configuration file)
sudo -u www-data php8.1 vendor/bin/shlink-installer install
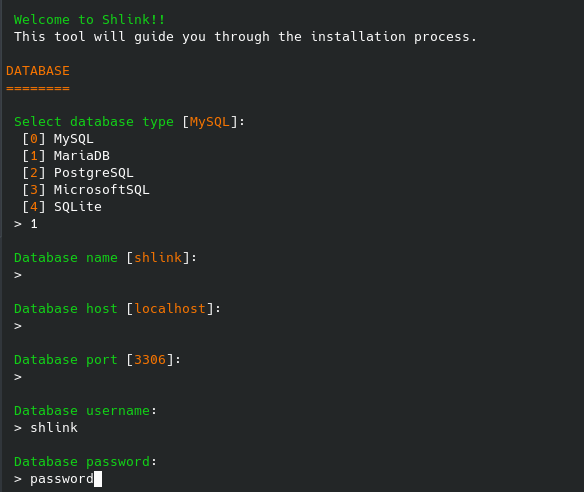
And we will get an interactive menu
DATABASE (the data of the connection to our database)

We choose 1 in our case and it will ask us for the following data
URL SHORTENER
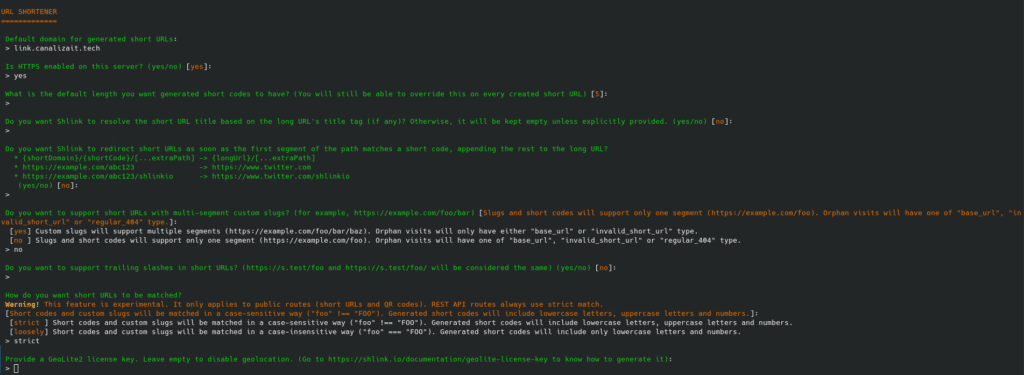
1. The default domain to generate the short URLs
2. With or without SSL
3. How many characters
4. If you want it to resolve based on the long URL
5. If you want it to resolve the URL as soon as possible and add the rest of the long URL
6. If you want it to support multilevel
7. If you want it to consider the same URL with or without a trailing slash
8. How you want them to match
9. GeoLite2 License.
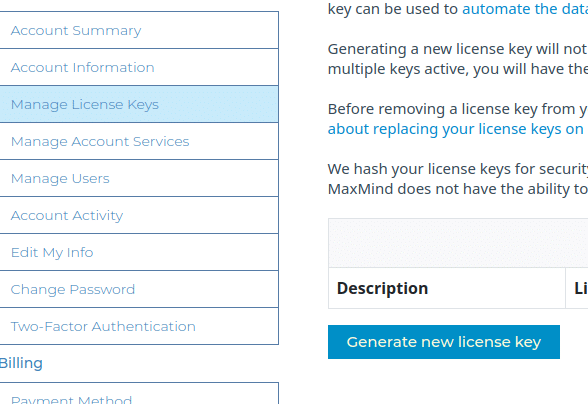
Here we stop a bit to explain. Shlink uses GeoLite2 to geolocate the visits, if it is not entered it simply will not geolocate them. Obtaining this license is free, you just have to:
Create an account in MAXMIND https://www.maxmind.com/en/geolite2/signup
And then generate the key
After that, it asks us what type of redirection we want, choose the best one for your case.
And how long we want them to be cached in seconds, by default 30
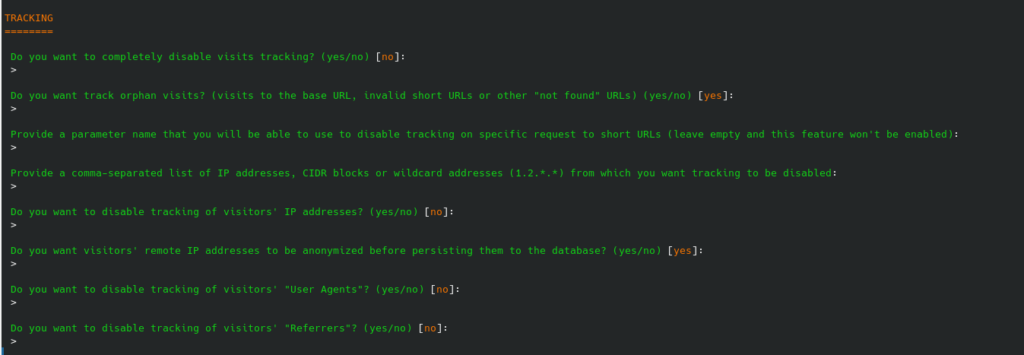
TRACKING
To keep the post short, I’ll simply answer the questions about what you want to track and if you want to exclude something like an IP range, a browser, etc.
REDIRECTS
Where you want to redirect according to what they ask you, it has to be in http:// or https:// format

QR CODES
How do you want the QR codes to be?

APPLICATION
There is no mystery, except perhaps the first one which means if that link will be indefinite or you can say 1, then it will be deleted after the first opening.

INTEGRATIONS
Since we are not setting up a cluster we will say no.

Once completed we will find our configuration file in /var/www/html/shlink/config/params with the name generated_config.php, which we can modify if we change our mind about the options selected during the installation.
WE CONTINUE WITH NGINX
We deleted the default site
rm /etc/nginx/sites-enabled/default
And now we create our site
nano /etc/nginx/sites-available/tudominio.conf
Adding the following
server {
listen 80;
listen [::]:80;
server_name tudominio.com;
root /var/www/html/shlink/public;
error_log /var/log/nginx/shlink.error;
access_log /var/log/nginx/shlink.access;
index index.php index.html index.htm index.nginx-debian.html;
location / {
# try to serve file directly, fallback to app.php
try_files $uri /index.php$is_args$args;
}
# redirect some entire folders
rewrite ^/(vendor|translations|build)/.* /index.php break;
location ~ \.php$ {
fastcgi_split_path_info ^(.+\.php)(/.+)$;
fastcgi_pass unix:/var/run/php/php8.1-fpm.sock;
fastcgi_index index.php;
fastcgi_param SCRIPT_FILENAME $document_root$fastcgi_script_name;
include fastcgi_params;
}
}
We create the symbolic link to activate it
ln -s /etc/nginx/sites-available/tudominio.conf /etc/nginx/sites-enabled/
We check that there are no errors in the configuration
nginx -t
And we recharge it
systemctl reload nginx
Now we will enable SSL since in our config we have said SSL
apt-get install certbot python3-certbot-nginx
certbot –nginx –agree-tos –redirect –hsts –staple-ocsp –email tumail@example.com -d tudominio.com
Once all this is done, we only need to generate our API key
sudo -u www-data php8.1 /var/www/html/shlink/bin/cli api-key:generate
And we go to https://app.shlink.io/ to add our server if we want the graphical interface
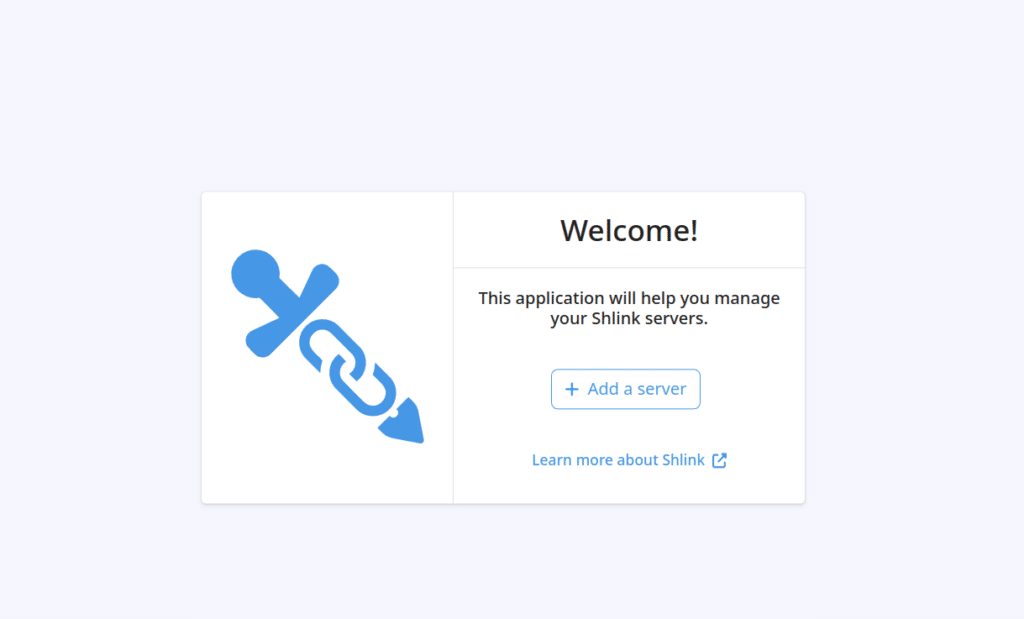

Or from the server itself using
sudo -u www-data php8.1 /var/www/html/shlink/bin/cli short-url:create
NOTE!!! Always provide the https://

We can see the options with:
sudo -u www-data php8.1 /var/www/html/shlink/bin/cli
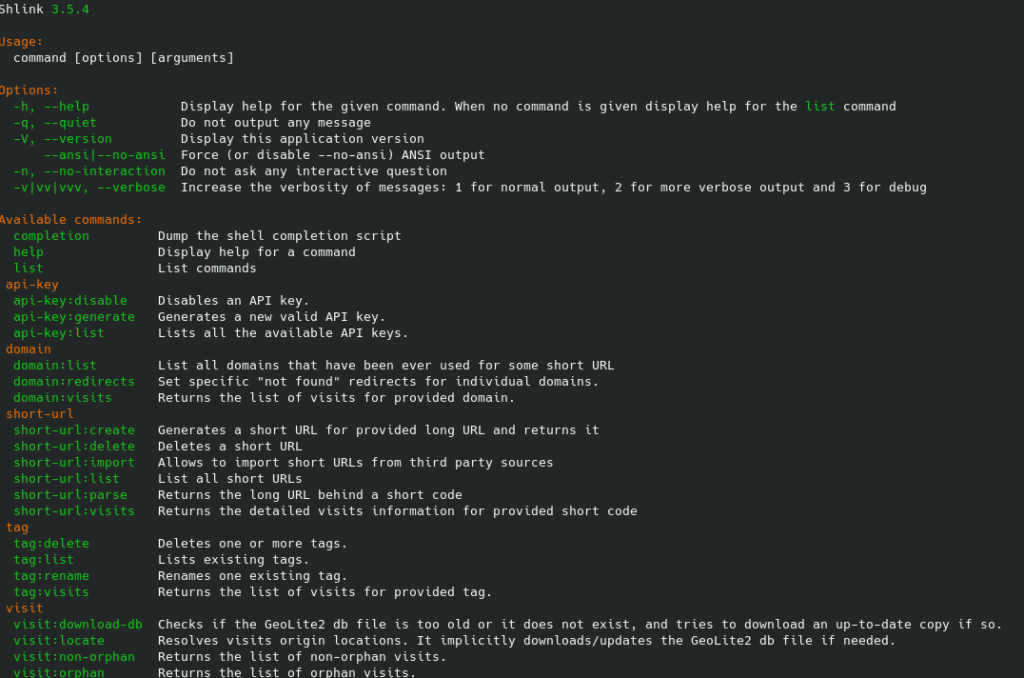
You can find the API documentation at https://shlink.io/documentation/api-docs/
And finally, to get the QR code, you just have to add /qr-code to the short URL.
TL.
FAQS
Shlink is an open source application that allows you to create your own URL shortening service. Its features include:
- Multi-domain: Allows you to manage multiple domains to generate short links.
- QR code generation: Facilitates the creation of QR codes for each short link.
- REST API: Offers a robust API for custom integrations.
- Bot detection: Identifies and filters bot accesses to obtain more accurate statistics.
It is not strictly necessary, but if you want Shlink to perform geolocation of visitors, you must obtain a free GeoLite2 license. To do so, create an account on MaxMind and generate a license key, which will be entered during Shlink setup.
By hosting your own URL shortening service with Shlink, you get:
- Full control: You manage your data and settings without relying on third parties.
- Customization: You tailor the service to your specific needs, including the use of custom domains and security settings.
- Privacy: Your data remains on your server, ensuring greater privacy and security.
Unlike commercial services, Shlink allows you to:
- Have full control over links without relying on third parties.
- Avoid unexpected usage restrictions or policies.
- Customize links and tracking metrics.
- Host it on your own server for added privacy.

