We continue
In this second part we will look at SquidGuard and Lightsquid.
We start with SquidGuard by going to Services / SquidGuard Proxy Filter, where we find the following sections in General Settings
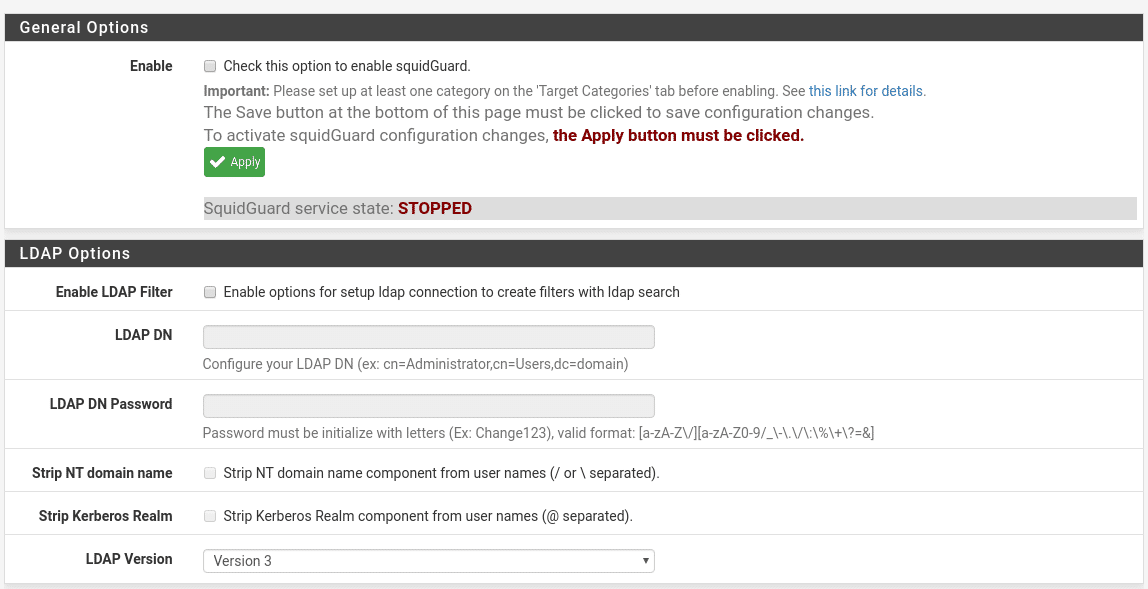
Where it tells us that before activating configure at least one Category and that after any change we must click on the Apply button, so we will leave it for the end.
We have the option to use LDAP to create filters, in this lab we are not going to use it.
The next options in this general tab are
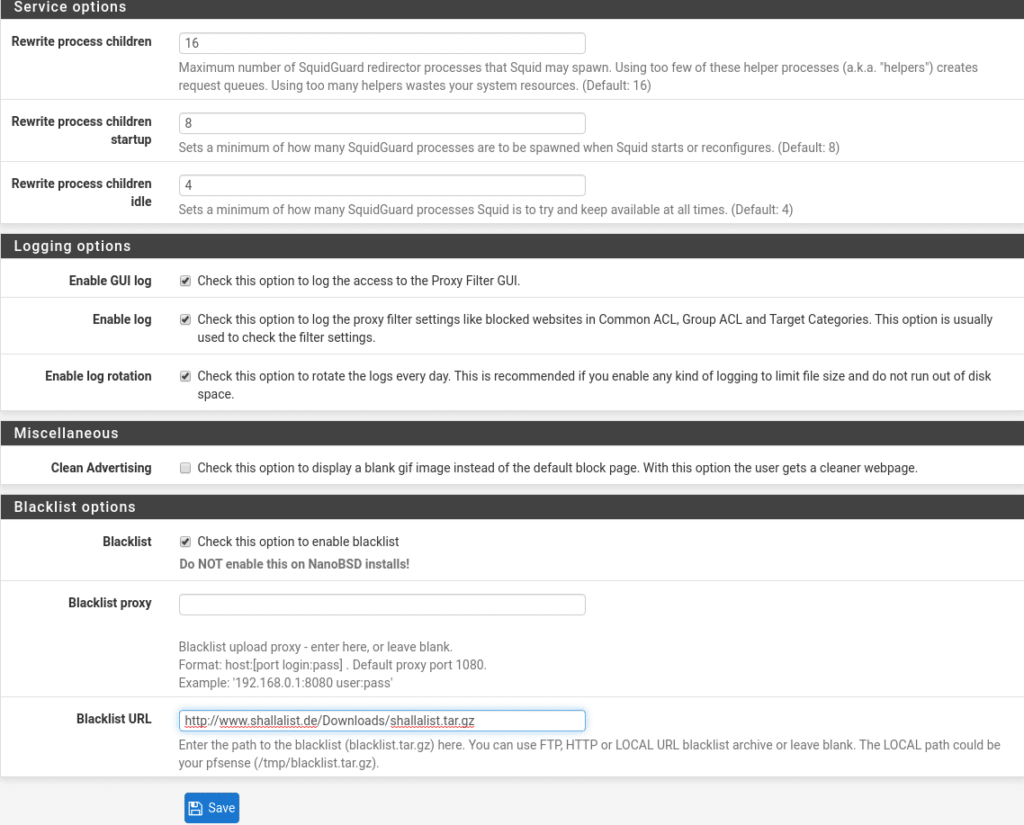
The part of Service options will depend on your Hardware and users, they should be adjusted. The default values do not usually give problems a priori, but keep in mind in Rewrite process children if they are too low will create request queues so the navigation will be less fluid and if you put a high number it is possible to saturate the system, so you have to test in each scenario the appropriate values.
The Rewrite process children startup is the number of child processes that will be available at startup.
The Rewrite process children idle is the number that it will try to maintain at all times.
These will also be adjusted according to scenarios.
In the Login options section there are three options:
Enable GUI log, we activate it to have access to the Proxy Filter GUI.
Enable log, activate it to be able to see what is happening in our Proxy Filter, who is being blocked, etc…as well as to check that the filters are working.
Enable log rotation, we also activate it so that the logs rotate daily because otherwise we will run out of disk space at some point.
In the Miscellaneous section we find Clean Advertising that if we activate it the users instead of receiving the default page that we use, they will receive a blank page.
And finally the section Blacklist options that can not miss.
The first option is to activate the Blacklist that of course we will activate since the warning of not activating it is only in installations that have been made with the nanoBSD tool, very used to create system images.
Then we have 2 options, to use a blacklist proxy or to specify a blacklist URL to load them, the latter is what we will do. UPDATED in the image we use shallalist in Blacklist but its creators have left this service, but don’t worry the University of France has gotten down to work at http://dsi.ut-capitole.fr/blacklists/download/blacklists_for_pfsense.tar.gz , save and go to the Target categories section

In this lab we are going to make it simple, we will create Blocked and Allowed by clicking on Add.
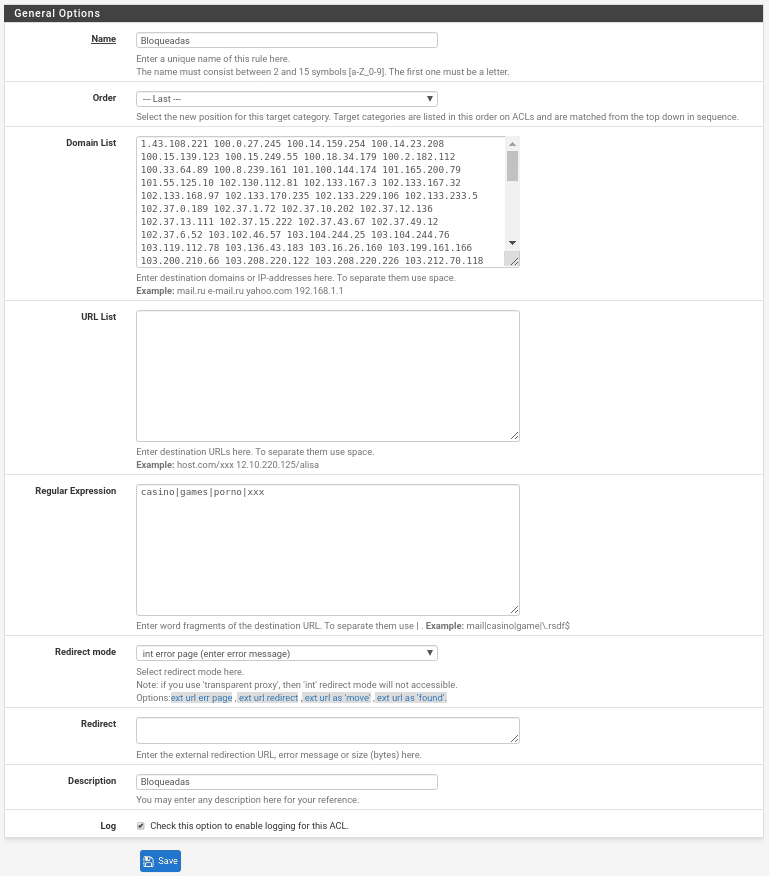
We put the name, we choose the position which should always be the last “LAST”, because if it was the first to check and there is something inside it that we allow in a later list it will still be blocked.
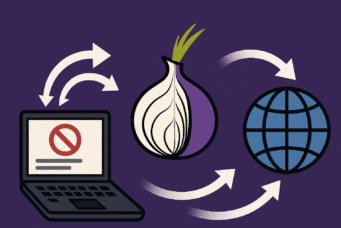
In Domain List we can put ips or domains to block separated by a space, in the example are put the ips of the Tor nodes that have been obtained from https://www.dan.me.uk/torlist/ . Here we have the problem that comes one per line and we need to be separated by a space to let us put it. How do we do it? Well, using a command with which we always do wonders “sed”, we copy and paste the ips in a document for example tor.tx and run it by console:
sed ‘:a;N;$!ba;s/\n/ /g’ tor.txt > torespaciado.txt
Now we open the file torespaciado.txt and copy and paste since we will have it without line breaks and with a space between the IPs.
If you want to block the Tor network keep in mind that you will have to update this field from time to time.
In URL list we can put the URLs to Block.
In Regular Expression we can put words to block as it indicates: casino|games|porno|xxx. In this part if you leave spaces none of them will work, that is to say, always separated by “|” but there is no space before or after.
In Redirect mode, we redirect the user to an external web that we have done to indicate that it is prohibited or to an error page. If we have selected external web we will write it in the Redirect field.
And finally very important to activate the log to be able to see that it is executing correctly and to see the blocks that it makes.
We do the same to create allowed with the only difference that in Redirect mode we leave it in none and we select that it is the first position “–“, having the same options that in blocked with the difference that what we put in each section will be allowed.
Now we will download the list that we put in general, going to the Blacklist tab and clicking on Download.
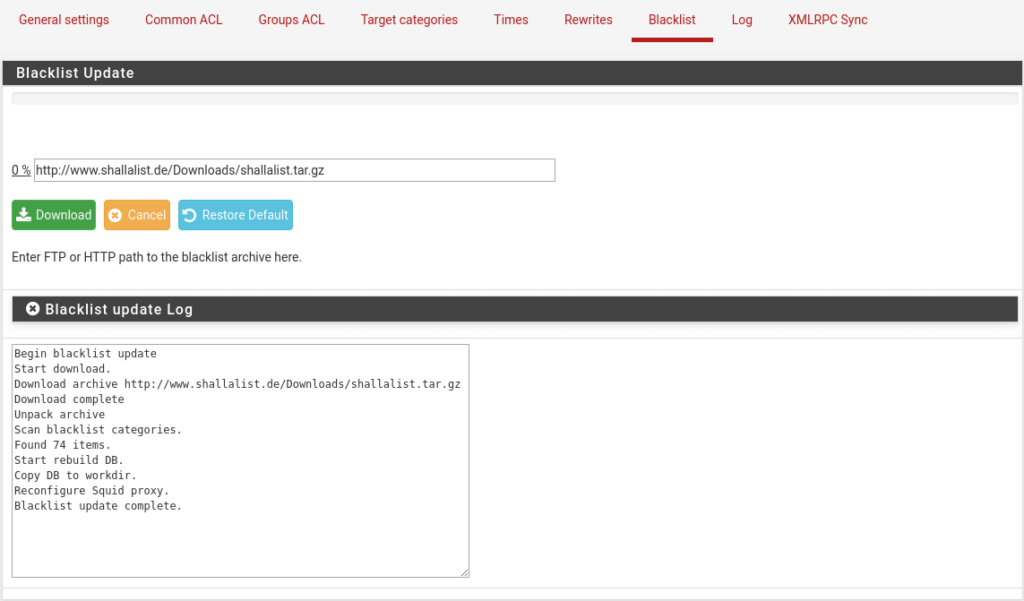
As we can see we have found 74 categories.
Now, if we wanted to use time slots for the rules because for example the night shift we give more scope because they are on duty and so they can enjoy while there is no notice, the first thing would be to create these slots in the Times tab giving Add, although this is a bit to the taste of the consumer and the scenario, since in the example to do it by shifts, if they are the same range of ips because they use the same equipment it would be best to do it by departments, we will see later why.
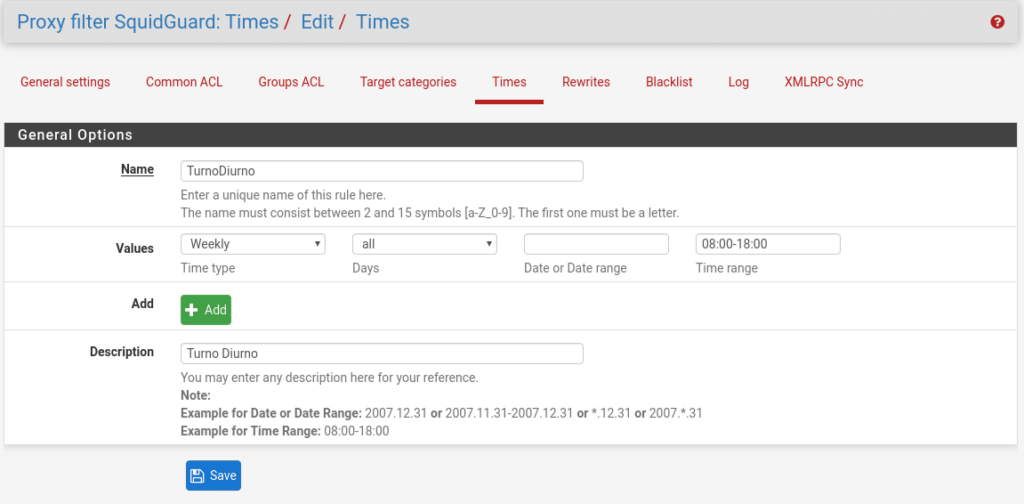
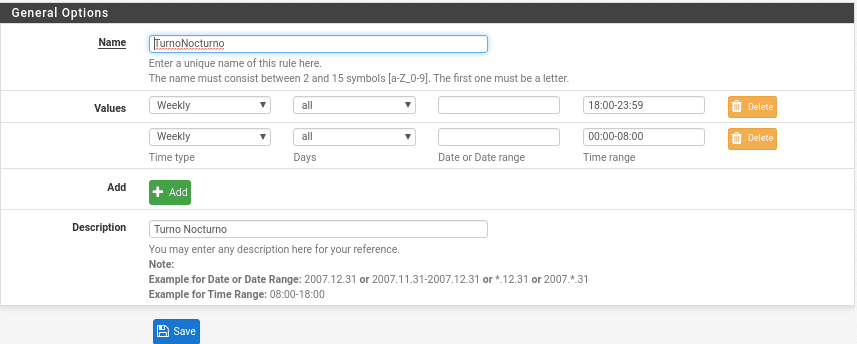
This part is not very complex as you can see, but there is always a but. For the Night shift you will have to create two intervals since it starts counting from 00:00 and would give us an error, being like this
Once this is done, we can make common ACL (Common ACL) and ACL by groups (Groups ACL), where we will see in both cases in Target Rule List first the Target categories in the chosen order, followed by the 74 downloaded categories where we must choose between whitelist (always allowed even if it is in another blocked category), allow (allowed as long as it is not in another category) or deny (not allowed) in the drop-down list. In our case the allowed ones we will put them in whitelist or allow since we have cured ourselves in health putting this list the first to check, therefore both options are valid, although we will choose whitelist also and so there is no doubt hehe.
To not extend too much we will explain Groups ACL as the Common ACL is practically the same but common to all users, note that the Common ACL have priority over the Group, ie, if in the common ACL there is a category for example blocked by much that in groups we allow it will still be blocked. In most scenarios you will have to use only group ACLs.
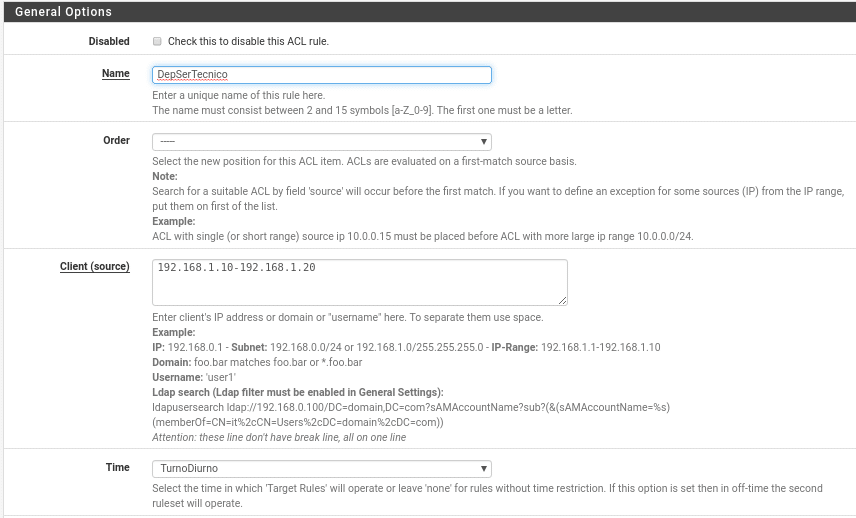
In this first part we can disable the rule by checking the Disabled box, we put a name, the order, which clients are affected depending on all the options it gives us, in this case the ips range 192.168.1.10-192.168.1.1.20 that belongs to Technical Service in the Daytime schedule previously created.
In the second part we find the Target rules List where you will understand why we commented earlier that the schedules will depend on your scenario, because here if you use the same equipment you would make two rules when you could have only one, because on the left are the categories within the schedule and on the right outside the schedule. We are not going to make all of them but the ones we have created and the categories, in this case we have selected the day shift so we are going to deny categories in hobby schedule and out of schedule allow it, so if they share teams we would not need to create a rule for different schedules, nor would we need to create the night schedule.

Now in this part there is one important thing the last category Default access [all].

This will define our policy, we can block everything by default and add what is allowed or allow everything and deny. In most cases if you do not want to complicate your life will be to allow everything and deny, in other cases you may be asked to deny everything except these 4 websites, so you know how to do it.
Finally in this tab
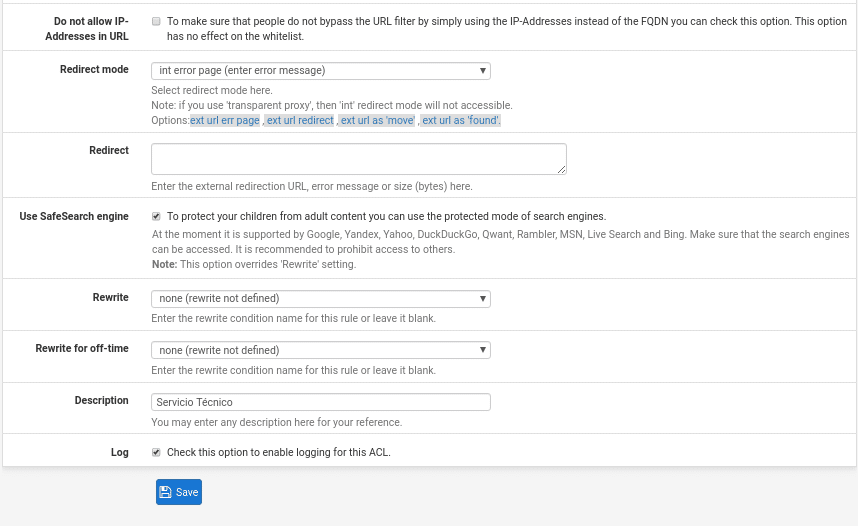
Do not allow IP-Addresses in URL if we use FQDN, by activating this option we will avoid a bypass using the IP instead of the FQDN.
Redirect Mode and Redirect, the same as we saw before.
Use SafeSearch engine if we activate it we only allow safe search engines where it indicates us which ones are supported, activating this checkbox the 2 following ones are annulled, since it is the same but to differentiate in schedule, of out of schedule.
And finally description and Log, where of course we activate it.
Finally we will comment simply the tab Rewrite where we will use it to make URL redirections, that is to say, when the user writes a concrete address it will be redirected to where we want.
And the logs tab where we will see configurations and what is happening in our Proxy Filter.
Once all this is done we can activate SquidGuard in General settings making sure that we click on the Apply button and if everything is correct we can save, if there is something wrong configured it will indicate us that there is something wrong.
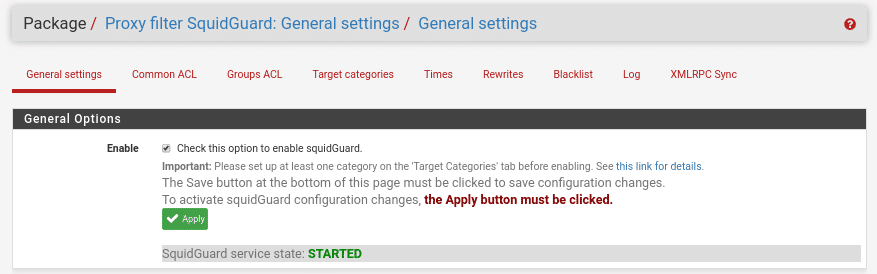
As everything was correct we have been able to apply, save and we can see the service started.
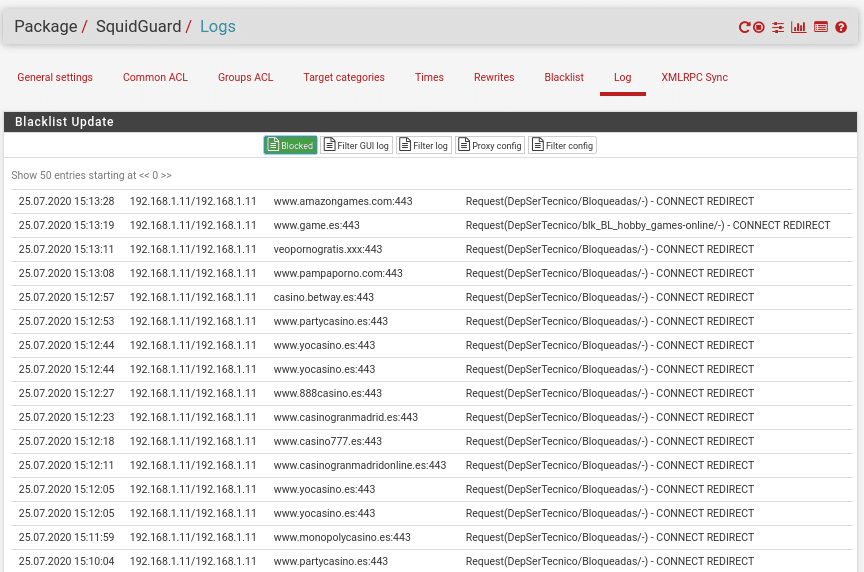
Now we can begin to test the navigation and see that the filters are working being reflected in the Logs tab, remember that if you are not using transparent proxy you must configure the equipment with the proxy address and port for all the services.
With the current configuration the client will receive the following error when trying to access any page where the url includes porn or casino, since we have put it as Regular expression, if we want to block better these categories in addition to the words in the URL we will block the corresponding categories, since only this way as it is it will be possible to access all those that do not contain in the URL the words.
If instead of choosing int error page in the rule that is blocking us in Redirect mode, we had chosen for example an external url, it would show us that url.
If we look at the logs we will see everything that is blocking that includes those words in the url.
We already have SquidGuard working, remember that every time you change something you have to apply in the General tab and restart the service in the logs tab in the circular arrow. As a recommendation if you have many users, categories, etc… do it at a time that does not affect the users because it can delay the startup and leave users offline.
Now we move on to Lightsquid which allows us to get statistics from our proxy. We go to Status/Squid Proxy Reports and we will find the following sections.
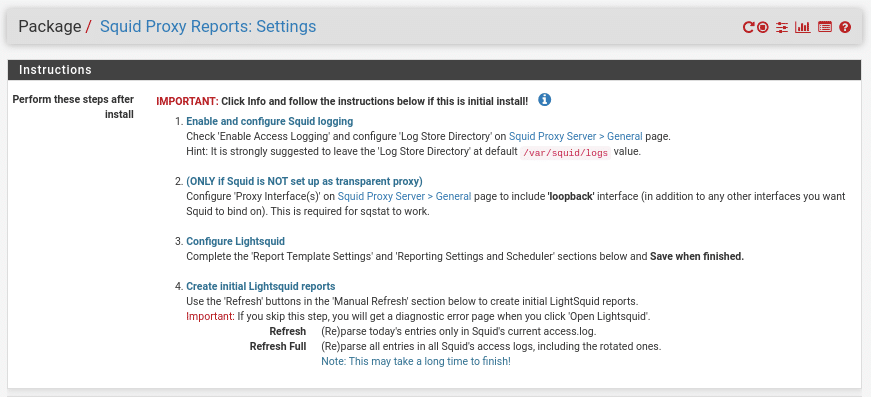
The instructions that if we have followed everything correctly the only thing left is to complete the other sections, save and refresh all.

The first part is the port where we will raise the Lightsquid, that is with SSL user and password.
The second part is the template that we like.
The third part is the resolution method where we have several options, by default comes DNS where it will show us the hostname.
If we want to exclude some url of the statistics separated by “|”.
How often we want to refresh and the manual refresh.
Once configured all this the service will start working and we can open it from the blue button Open Lightsquid in the section Web Service Setting showing the following screen where we can choose which day we want to see
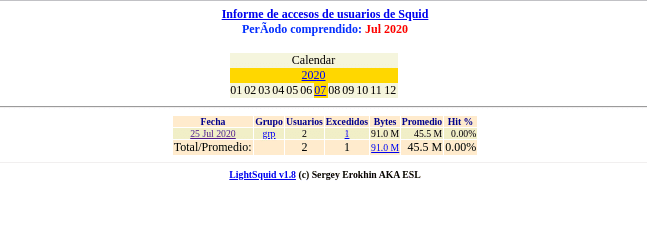
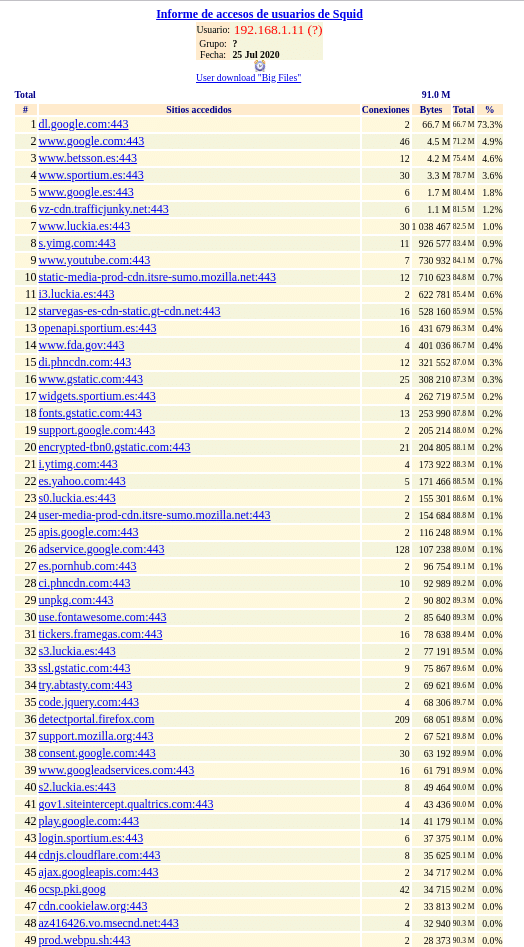
As it is a laboratory, we have done little to check the rules, but if we click on it we can see that from the machine that was using the proxy we obtain its navigation data.
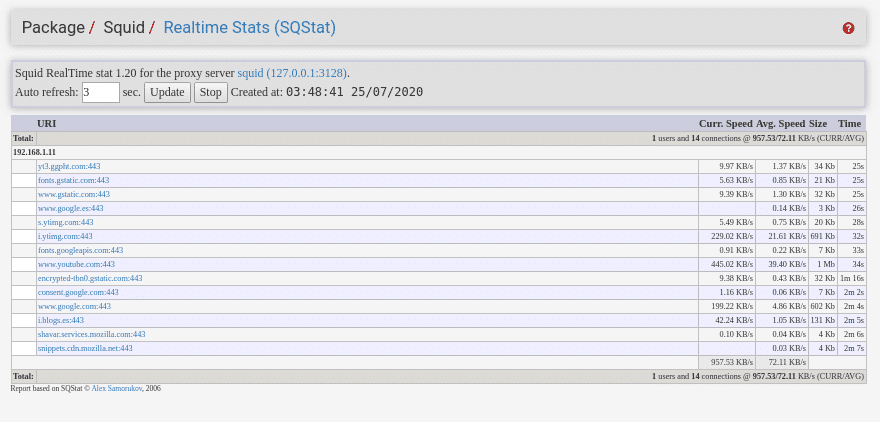
The other blue button, Open sqstat, is for viewing real-time statistics.
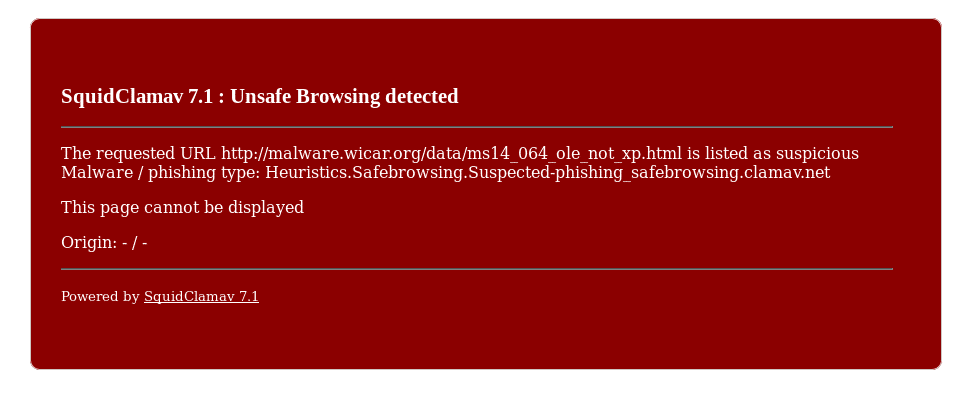
As last part of this post taking advantage that we have the laboratory machine turned on to navigate using the proxy we will see something that would be of the part I of these two post and it is as it cuts the virus Clam-AV. For it we are going to open a Web with virus from the machine that is using the proxy, this Web will be Wicar, a very good Web that offers us to test virus, exploits and other threats all of them harmless. Therefore we open https://www.wicar.org/test-malware.html from the browser. Google itself will warn us and block access, we give that we recognize the risk and we will get the following windows of the different tests
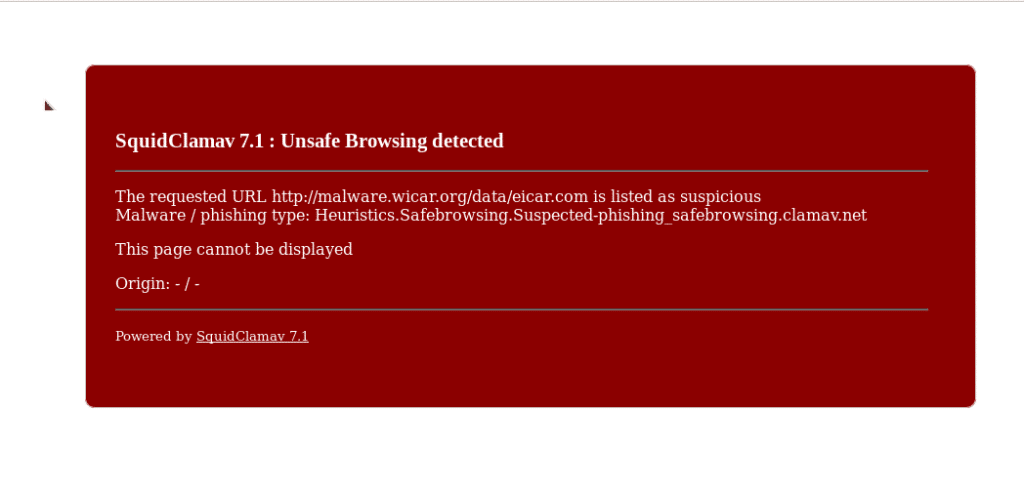
 And so with all of them, we can also observe it in our Pfsense in several logs as in Service/Squid Proxy Server/Real Time in the following section

As always go to Services/Watchdog and add the services so that in case of shutdown due to any failure it will pick them up again.
Enjoy, have a nice weekend.
TL.