The time has come
This time we will upgrade our lab machine from Debian 9 to Debian 10, it’s about time. Before upgrading any operating system it is advisable to have a backup of the system or at least of the data that we do not want to lose, because although it is a simple process, any failure in the upgrade process can leave the operating system totally damaged, as for example a power outage or hardware failure.
The update does not overwrite anything in the /home directory, but it is possible that some applications or desktop environments will be overwritten with new values, for example, if you have the custom application bar, you will lose it and you will have to customize it again or find out where the customization is stored and once the system is updated, overwrite the new one.
Keep in mind that during the upgrade there will be services that will be stopped so if it is a production system, plan for it, because also as the kernel will be upgraded it is necessary to reboot. If the upgrade is done remotely (only if we do not have desktop environment installed, because otherwise it will fail), make sure that we can reach the machine in case of any unforeseen event, if it is a physical machine I recommend doing the upgrade in-situ, if it is virtual simply have access to the hypervisor. Why do we say this? There is a risk of losing the network when the previous system uses eth0,wlan0 nomenclature once upgraded to Buster.
Note: You cannot upgrade from older versions without having previously upgraded to Debian 9.
LET’S START
In our case being a lab machine in VirtualBox we will simply take a snapshot, selecting the machine and clicking on Take, we will give it a name for example PreUpgrade, with a description if we want like “Before upgrading to Debian 10”.

Once we have a backup copy and we have made sure that in case of any inconvenience we will always be able to access our virtual or physical machine, we proceed by opening a terminal to check what third party software we have installed that does not use the pure Debian 9 repositories.
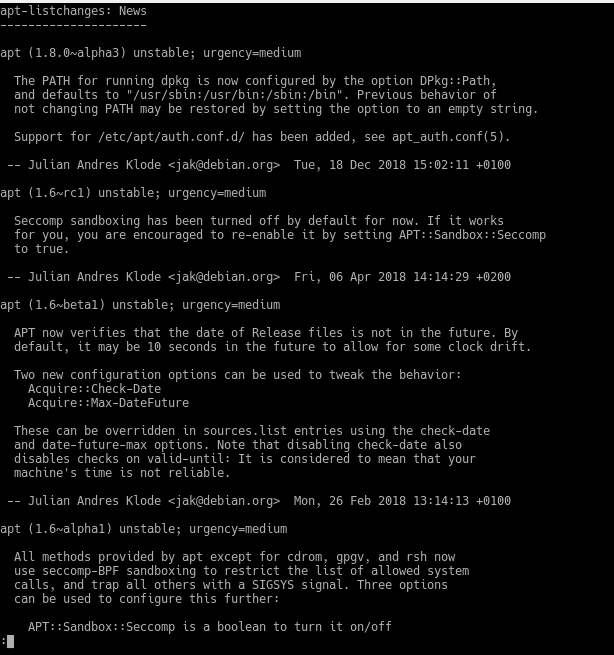
sudo aptitude search ‘~i(!~ODebian)’
If for any reason you cannot find the command
sudo apt install aptitude
And we launch the previous command again.
This would return us a list of obsolete or third party packages, where the obsolete ones would be advisable to uninstall and the third party ones to verify that they have support for Debian 10, moreover, to avoid possible conflicts the best thing is to uninstall the list that returns us before proceeding with the update and to reinstall what we need after completing the update. Also, if you have packages installed from trial versions, switch to their stable versions or remove them.

In our case we have no obsolete or third party packages so we proceed first to update our current Debian 9
sudo apt update
sudo apt upgrade
sudo apt dist-upgrade
We check that we have no consistency problems or broken packets.
sudo dpkg -C
sudo apt-mark showhold
Before proceeding with the upgrade if we have obtained inconsistencies or broken packages it is necessary to fix it, for this you can see details with
sudo dpkg –audit
Or use the following command to view the detail of all packages installed on your system
sudo dpkg -l | pager
Once all this is done with our Debian 9 system updated and any package problems fixed we proceed to update the repositories, making a backup first
sudo cp /etc/apt/sources.list /etc/apt/sources.list.back
Then we replace the repositories from Stretch to Buster in a simple way in the file /etc/apt/sources.list
sudo sed -i ‘s/stretch/buster/g’ /etc/apt/sources.list
This command will replace the word stretch with buster in /etc/apt/sources.list, so in our case.
deb http://ftp.es.debian.org/debian/ buster main
deb-src http://ftp.es.debian.org/debian/ buster main
deb http://security.debian.org/debian-security buster/updates main contrib
deb-src http://security.debian.org/debian-security buster/updates main contrib
# stretch-updates, previously known as ‘volatile’
deb http://ftp.es.debian.org/debian/ buster-updates main contrib
deb-src http://ftp.es.debian.org/debian/ buster-updates main contrib
We do the same with the other lists if you have checked the support with Debian 10, although we recommend that these lists are moved to another directory and once updated proceed to introduce the updated lists.
sudo sed -i ‘s/stretch/buster/g’ /etc/apt/sources.list.d/*.list
We update the package index
sudo apt update
This will return the number of upgradable packages at the end of the list and we should run the following if we want to see them
sudo apt list –upgradable
Finally, we perform the upgrade
sudo apt upgrade
The list of new changes will appear, press q to continue.
And the next screen if we want to restart the services without asking, in our case we say yes because we foresee any incident or if it were a production server would be communicated its intervention to whom it corresponds.

To conclude
sudo apt dist-upgrade
And we restart to check that everything has been successful.
You can remove the packages that are no longer needed with
sudo apt autoremove
But we are not going to leave it there, we will finish by updating the kernel to the latest version from the sources, taking advantage of the fact that we have the backup copy just made and in case of production systems it is planned.
Upgrade the kernel to the latest stable version kernel-5.6.3

WARNING2!!! First of all, compiling a kernel from source requires a few GB free, 25 in this case, so make sure you have space available.
First we install dependencies
sudo apt install gcc libncurses5-dev dpkg-dev bison flex git fakeroot build-essential ncurses-dev xz-utils libssl-dev bc build-essential libncurses5-dev fakeroot rsync libelf-dev
We download the latest kernel from https://kernel.org in /root/kernel for example being root, in this case we are not going to do it in /tmp as in other posts, in case we want to reconfigure later, since we have to reboot and in /tmp it would be deleted.
cd /root/
mkdir kernel
cd /root/kernel
curl -lO https://cdn.kernel.org/pub/linux/kernel/v5.x/linux-5.6.3.tar.xz
Unzip it
tar -xvf linux-5.6.3.tar.xz
We enter the directory
cd linux-5.6.3
We launched
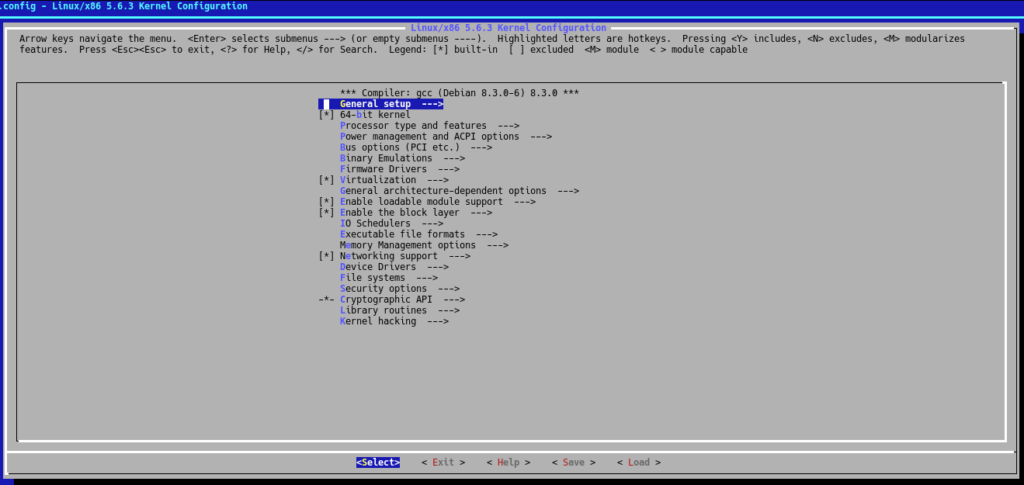
make menuconfig
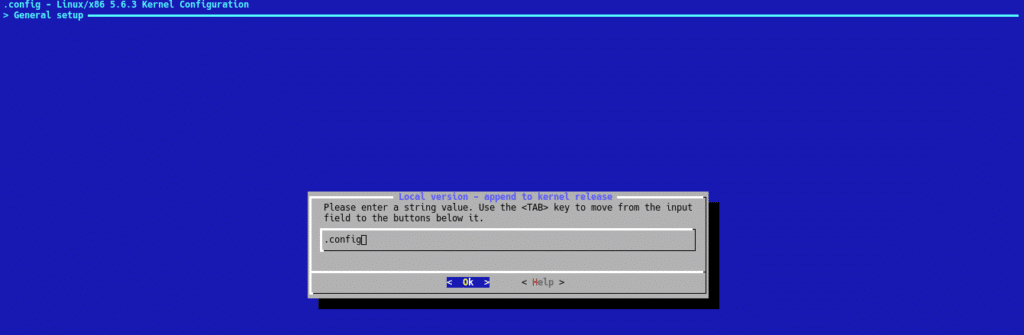
Where a configuration gui will appear, we will not go into details so we choose General Setup but take a look at it.
After selecting General Setup, we select Local version -append to kernel release
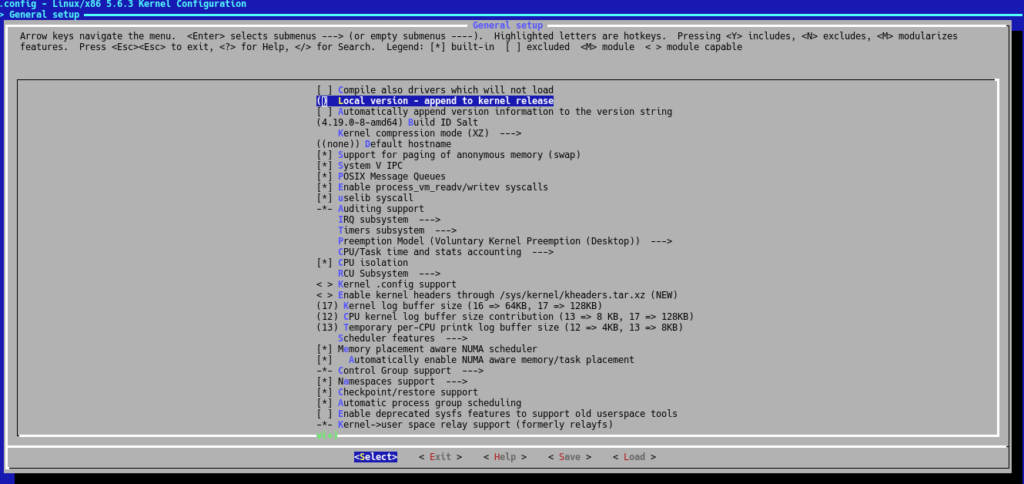
we enter .config
Now Save/Exit/Exit
To avoid an error updating in this way, in the .config file that has just been created we will comment out the lines containing CONFIG_SYSTEM_TRUSTED_KEYS in a quick way
sed -i ‘s/CONFIG_SYSTEM_TRUSTED_KEYS/#CONFIG_SYSTEM_TRUSTED_KEYS/g’ .config
And we build the package
make deb-pkg -j2
Remember that with the -j flag we will indicate the processors we have available to make it faster. When it asks you the question of the certificate simply enter.
This process will take a while, you can have a coffee or three while. When it finishes, we will find the .deb in the top level, therefore we execute
cd .. && dpkg -i linux-*.deb
We reboot and if everything went well, we write in a terminal to check our kernel.
uname -a

Now we can delete the old kernel or leave it, at the moment I recommend to leave it in case you have any problem with the new version.
If during all this process you have had some kind of problem write us with the error that gives you or what is the failure that you are having and we will be happy to help you.
Note: When you have already compiled to your liking delete the folder that we created /root/kernel to have the 25GB that occupies.
A pleasure, live the present.
TL.